 A few months ago I stumbled upon a blog post on sourdough. Though I hadn’t eaten it often, memories of Cracker Barrel’s Spicy Grilled Catfish Sandwiches on sourdough were enough to fire me up to learn more. The idea of bread made without yeast sounded good, and knowing that my starter could potentially outlive generations of my family was just insane! It is thought that sourdough-type breads can be dated back to Old Testament Biblical times when yeast couldn’t be picked up at the nearest Piggly Wiggly. How cool is that? I sometimes imagine that I’m baking with Sarah, Ruth, or Rebekah. Would deceitful Jacob have served my bread with his game stew?
The steps to making a great starter are easy enough to do with your children. Read here for detailed instructions.
Since baking my first round, tangy loaf in March, my Monday baking routine has always included a rectangular sourdough. It’s great for toast, snacking, packed lunch sandwiches, and probably bread pudding, though we never have leftovers to try it.
The perks of sourdough:
- Taking yeast off the grocery list
- Knowing that you have a “pet” in your refrigerator
- The ability to share your starter with an adventurous baking neighbor
- Tasting the flavors deepen over time as the starter ages
- An excuse to play with food (kneading)…my favorite part of cooking is the tactile experience
- Guests will think you labored long hours to bake such a beautiful, crusty loaf of artisan bread
- Forgetting to preheat the oven is no problem!
Sourdough Bread
from S. John Ross at io.com with my technique. Check out the website for explicitly detailed content and useful info for beginners
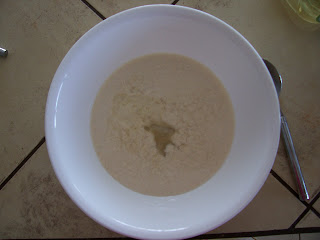
2 c. sponge (proofed starter) SPONGE
3 c. AP flour Approximate amount. May need more or less depending on consistency of sponge and structure of flour. My flour is from Nicaragua and is extremely dense…therefore I use less.
2 T. olive oil
4 t. sugar I use less sugar, usually 2 t.
2 t. salt I also use about half this amount of salt
In a large bowl, to the sponge, add oil, sugar and salt. Stir to combine using the handle end of a sturdy wooden spoon. 
Stir in flour 1/2 cup at a time, until the dough masses and no longer sticks to the edges of the bowl. Plop onto a floured surface and let the fun begin! (You can also make this in a stand mixer with bread hook attachment and knead for 10 min.)
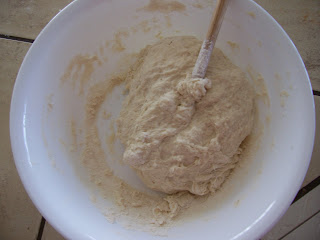
 Sticky stage
Knead the bread with floured hands, adding flour as necessary to keep it from sticking to the counter surface and to hands. It will go through a few stages: sticky, sticky with dry clumps of flour on the outer surface, dryish, and then to smooth. Once you get to smooth, knead 5-10 minutes more or until the dough is uniform, smooth, and passes the “window test.” Pull a walnut-sized piece off the mass, roll into a ball and stretch. If you can see light through the dough without it ripping, you’re done!
Place dough in an oiled bowl and cover with a damp tea towel. Set bowl in a warm place (or a warmed oven) to double in size. Don’t despair if rising takes more than 3 hours or doesn’t quite double.
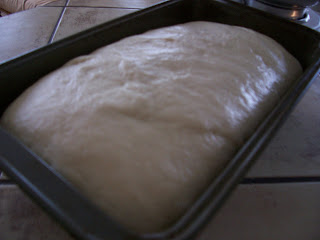
Grease a loaf pan or cookie sheet in preparation for baking. Remove doubled loaf, knead 1 minute, and shape into loaf or large round. Score for artsy value, if desired, with a serrated knife and allow to rise again. You may cover the dough with a tea towel, but I find that it sticks and deflates dough when removed. The best method I’ve found is to place the dough in a warm oven accompanied by a pot or coffeepot of boiling water. The steam helps to proof the dough, and also helps keep the oven warm. I’ve heard that keeping the oven light on is also helpful, but I find it unnecessary.
After bread has (ideally) doubled once more, remove hot water and/or tea towel and turn on oven to 350F. Bake 35-50 minutes, or until the bread sounds hollow when thumped from the bottom. (Do this by covering hands with towel and thumping with fist.) If you wish for a lightly golden loaf, bake below the middle rack. For a crustier, darker loaf, bake in the middle of the oven or above. Cool in pan 5 minutes and completely cool on rack before storing. *Tip: I don’t own a cooling rack, so I flip the bread onto it’s side in the loaf pan, alternating sides every 15 minutes to keep moisture from collecting on the bread and speeding up cooling time.
*** Make sure to feed your leftover starter and store in the refrigerator for future baking!


Leave a Reply